Frame Tool Kit for Flax Build
Bamboo Bicycle Club Team
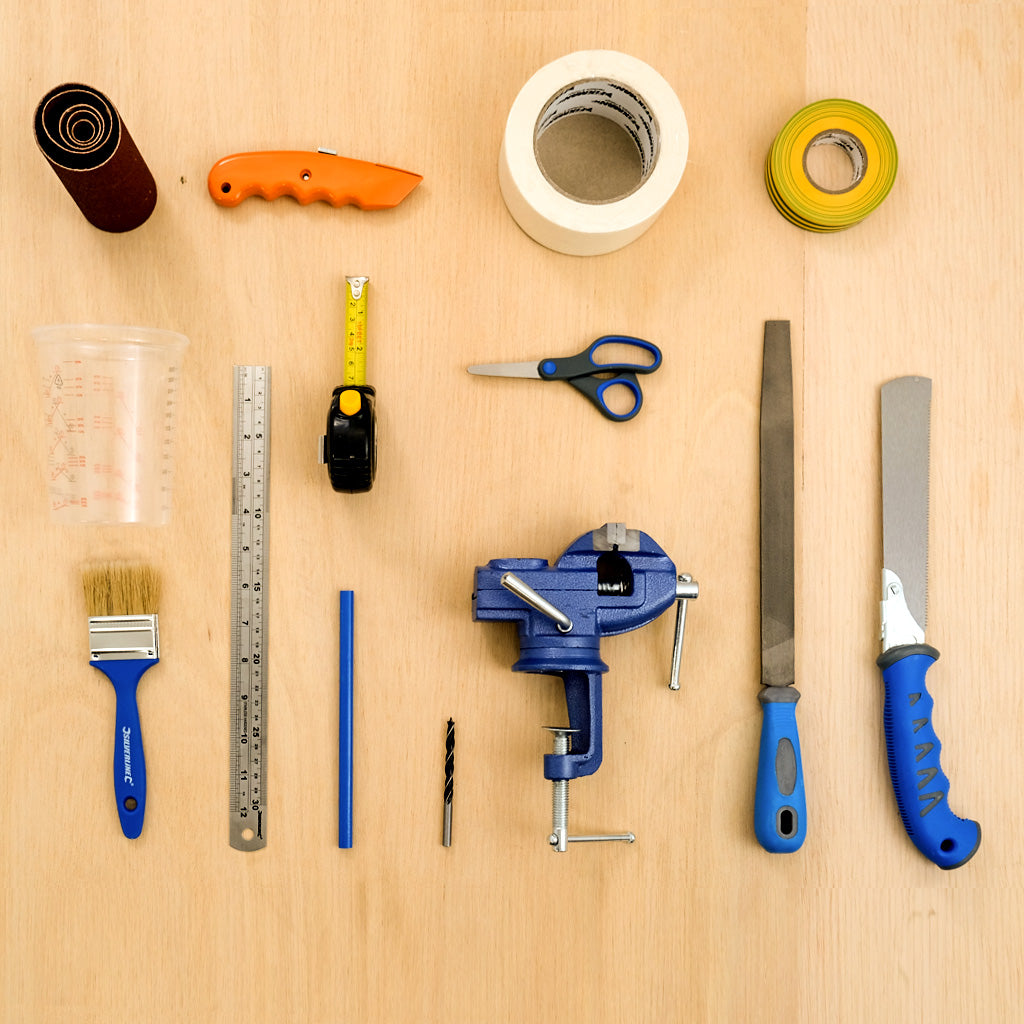
“Ok, we've finally done it! we've created a tool kit for everyone building at home. This comes with all the tools you need at home, you will just need a drill. It even comes with a reusable brush so you can reuse again and again.”
| Item | Description |
| Masking Tape | Masking tape 25 x50mm |
| 40 Grit Sandpaper | Cloth belt 40 grit |
| Saw | 150mm flush cut saw |
| Tape Measure | Tape measure 2M |
| Round File | 1/2 round file |
| Pencils | Carpenter pencils |
| Ruller | Steel Frame Square |
| Knife | Stanley Knife |
| Electrical tape | Electrical Tape 30m |
| Drill Bits | 6 mm |
| Ratio Cup | Ratio Cup |
| Brush | 20cm Brush |
| Universal Vice |
Clamp vice with rotation |
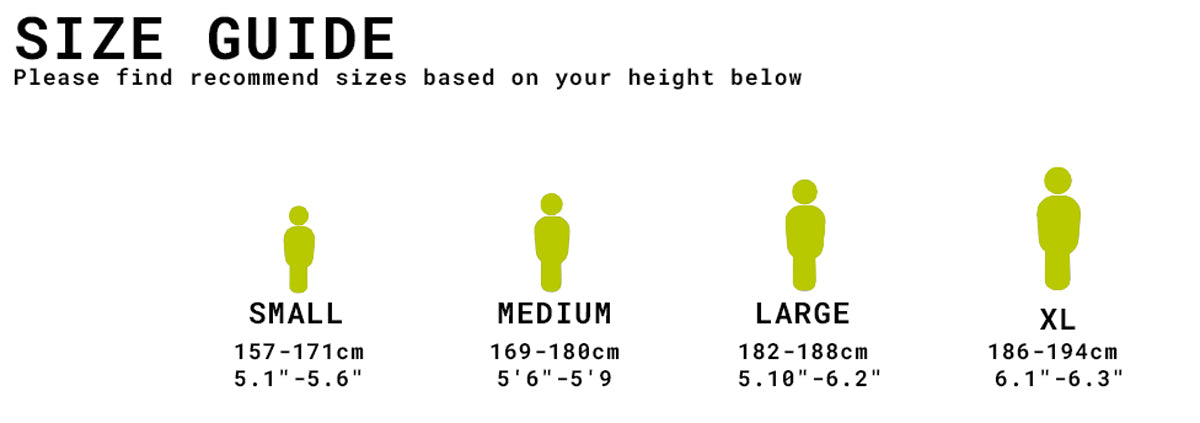
Frame Sizing Guide
If you are in between two sizes we recommend going for the smaller size as you can adjust the frame fit on smaller frame but if the frame is two large then you may be unable to adjust. Alternatively choose a custom frame.

Bike Geometry - Introduction
Frame sizes are referred to as geometry, the geometry encompass the shape, length and the angles of the frame. Each frame type will have certain angles and measurements to give you a ride characteristics associated with the frame type.
A road bike will typically move the rider into a more forward position (seat and head tube angles of 72/73 degrees) to maximise power transfer and elongate the rider to improve aerodynamics.
A dutch style bicycle will be another extreme of geometry moving the rider further back (seat and head tube angles of 68 degrees) on the frame to suit relaxed riding and flat terrain as well positioning the rider in a upright position.
You can read many books on geometry! This a brief insight. Try and select a bicycle that suits your requirement and the geometry should match. E.g Road bike for road usage, gravel for mixed on and off road, MTB for off-road trails.
How to check your fit for a frame.
The key measurements used for a stock frame are you inside leg and overall height.
Height
- Simply stand upright in bare feet, with your back against a wall/doorframe.
- Place a pen or pencil atop your head and parallel to the floor.
- Make a small mark on the surface and measure.
Inside Leg
- In bare feet; stand upright with your back against a wall.
- Place a book/ruler between your legs and level with your crotch.
- Have someone measure the distance from the top of the book/ruler to the floor.
If you find that you fall between 2 sizes, the general rule of thumb is to opt for the smaller size. Why you may ask? Well, it’s because it’s generally considered easier to make a bike that’s a little small fit than one that’s too large. There are certain alterations that you can make to a smaller bike to correct the sizing.
These include: lengthening the stem length, crank length and raising the saddle height. It is much more difficult to adjust a bike that is too large to fit the rider. After all, a seat post can only drop down so far. Whereas fitting too short a stem can result in overly responsive (twitchy) steering.
More about components - Traditionally frames would be built at a local bike shop and the frame would determine the fit with fixed component options.
With modern compact frames most of the final frame fit will be done with components to adjust the position of the rider using a broad range of component options like, seatpost type, stem length, handlebar width etc.
Drop us a email to info(@)bamboobicycleclub.org with any questions


